
 |
!! Please select country!!
Created: 8 Oct 2007
Last Updated: 29 Dec 2007
|
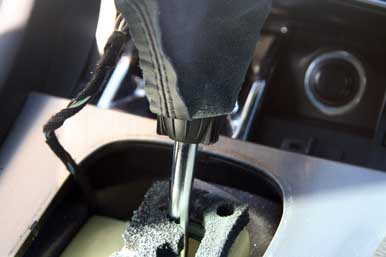
To remove the audio unit on the facelifted Mercedes W203 C and W209 CLK class, you have to access the four torx screws that hold it in place. This is simpler on the CLK than the C, as you do not have to remove the air vents. a) Remove gear knob and surround. Pull up the edge of the gearknob, and then turn the locking ring at the bottom of the gearknob anti-clockwise (i.e not the natural way you would expect) half a turn and pull the gearknob upward to remove. Picture of the locking ring.
b) Remove panel around gear knob. This is done by simply pulling it upwards from the front, and then the rear. c) Remove ash-tray. Release the catches and pull upwards. Here is a picture of the ashtray and the catches.
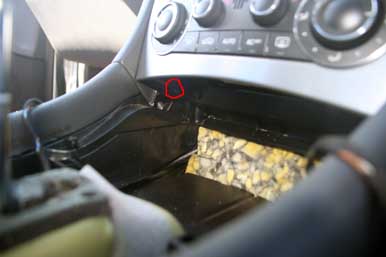
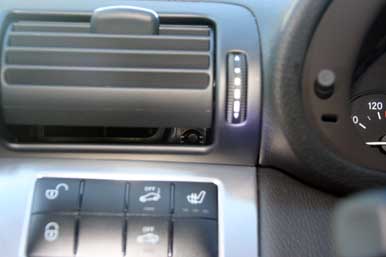
d) Remove aircon surround. Look up under the panel through where the ashtray was. You can either see two screws and two catches or four screws. - if you have 4 screws remove the two that are at an angle, otherwise release the catches. You can then remove the lower control panel, and see the 2 torx screws that hold the bottom of the audio unit. Here is a picture with the screw on the left that must be removed highlighted.
Remove the aircon controls and panel, which reveals the lower screws for the audio system.
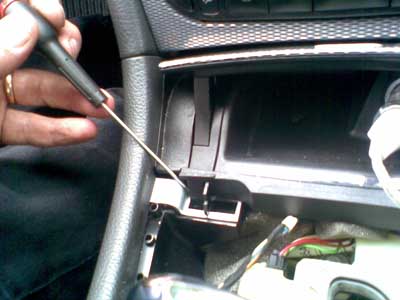
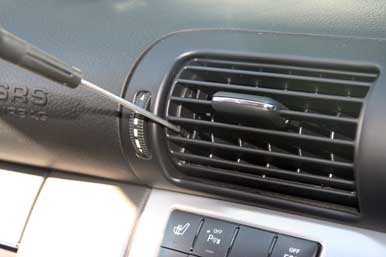
e) C Class only: - remove vents The vents are held in by 2 screws at the bottom corners and two clips at the top corner. To see these screws and clips the vents have to be moved completely to the top and then completely to the bottom. To allow the vents to move, there are catches that must be released with a small screwdriver. The catch to make it move to the top is shown in this picture, the catch to make it move to the top is two sections above.
After the vent has been moved to the upper position, you can see the lower screws. Loosen these but not too far or they'll drop out.
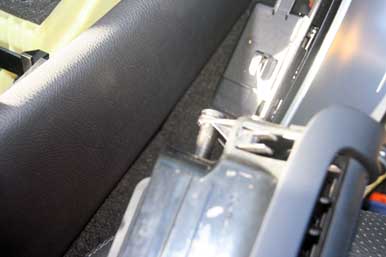
Then move the vent to the lower position (don't forget to release the locks) to view the top catches and using the pulling hooks, pull the catch in and the vent out. Here is a picture of the catch on the vent when the vent is removed so you can see how it works.
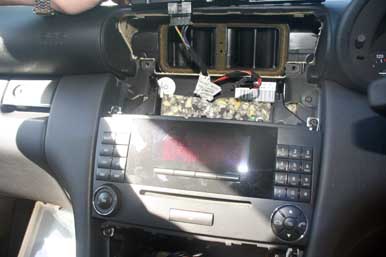
f) C Class only: remove top two screws holding the Upper Control Panel (UCP),
and remove the UCP to show the top two screws of the audio unit.
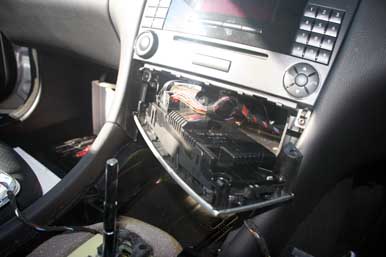
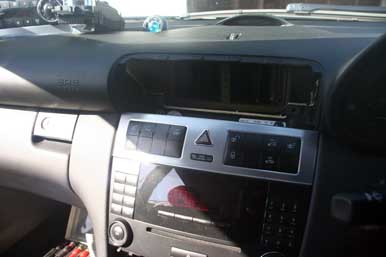
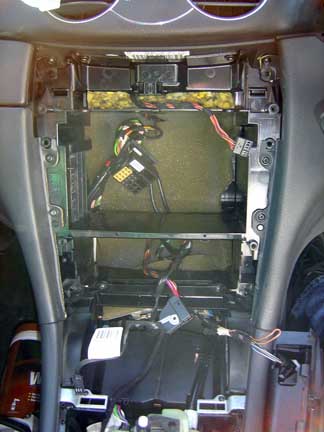
g) CLK class - open the coin tray next to the upper control panel, slide your finger in behind the edge of the UCP and pull - it will pop out quite easily, revealing the top two screws of the audio unit. h) Remove audio unit Remove the four screws holding the audio unit, and remove the audio unit. i) More pictures Here is what the CLK looks like with those panels and the audio unit removed.
|
If you found this information useful, please support the site by making a donation via Paypal. Any amount at all helps me improve the information on the site. |
Comand Online Ltd - the place to buy Mercedes iPod kits, phone kits, retrofit parts & map disks MY AUTOCAR - THE BEST PLACE TO TALK CARS |